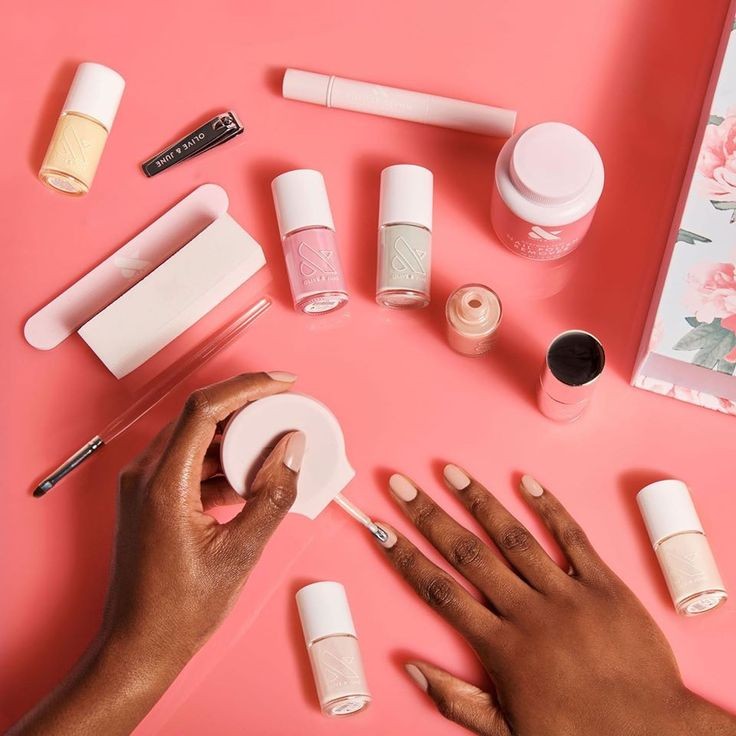
Why not try your hand at a DIY(do-it-yourself) manicure? There are many DIY manicure options to choose from, whether you want a simple gloss look or more elaborate nail art.

Let me tell you, I love painting my nails at home since it saves me time and allows me to experiment with different colors and styles to see how they turn out. So now I’d want to share my how-to and a few steps with you to demonstrate how easy it is to do a DIY manicure at home, how economical it is, and how much fun it can be. I assure you that once you get the hang of this DIY manicure technique, you’ll look like you’ve had your nails done professionally without paying a fortune!
In order to achieve a long-lasting DIY manicure, you’ll need the correct tools and techniques. Let me start yall with the tools you’ll need to get started on your DIY manicure, by the way, each of these tools I am about to mention is pocket friendly so no need to worry.
DIY Manicure; What You’ll Need

- Nail Polish Remover
- Cotton pads
- Nail File
- Nail Clippers
- Cuticle pusher
- Cuticle cutter
- Nail buffer
- Hand cream
- Basecoat
- Nail Polish
- Top Coat
- Cuticle oil
- Hand Towel
- Bowl
- Hand Brush
To ensure that nail color lasts longer than three days, you must remove all traces of dirt, oil, and polish residue to provide a clean base for it to adhere to. Yes, of course! For some, this may be optional, but it is a must-do for me when it comes to my DIY manicure. Before applying any polish to my nails, I always start with the pre-prep. This pre-prep method entails soaking the nails as well; continue reading to learn more step by step.
Diy Manicure 5 Step Pre-Prep

S1. REMOVE OLD POLISH
First and foremost, you must remove any nail polish you may have on. Remove your old nail polish gently with your nail polish remover and cotton pads. Make sure to get the sides of the nails.
S2. CUT, FILE, BUFF
Trim your nails with your nail clippers. If you enjoy a bit of a free edge like me, don’t cut them too short. Then, gently shape them with the nail file to the desired shape. Keep things simple, square-shaped nails with rounded edges or simple rounded nails. Smooth the lines and rough edges that the nail Clippers have left behind.
Smooth the top of your nail bed using the nail buffer. However, do not buff the nails too smooth, since this will prevent the nail polish from adhering to the nails.
S3. SOAK
Fill a bowl with warm water (large enough to hold your palms). Add some salve or a light cleanser to the water and soak your hands in it for 2-3 minutes. Soaking the nails softens the cuticles as well. It dislodges dirt and dead skin cells. Clean the nails and the skin around them with a light nail brush to eliminate any dirt. Don’t forget to go beneath the free edge of the nails, if there is any.
S4. PUSH BACK & CUT CUTICLES
Wipe your nails and hands clean then massage some cuticle oil into them. You can do this after you’ve pushed back and cut your cuticles, which I prefer. Then, gently push the cuticles back with your cuticle pusher. If you use too much pressure, the cuticles will be pushed too far in and your nails will be damaged. Cut the cuticles with your cuticle cutter after pushing them back.
S5. MASSAGE
Use a hand cream or moisturizer to massage your hands. Concentrate on your fingers and the region around your nails in particular.
A DIY manicure may seem like a lengthy procedure at this point but honestly, to me, it is more than just cutting the nails and applying polish, with that being said now it’s time to have some fun. This is the part I love: after the 5-step pre-prep, your nails should appear renewed, fresh, and ready for a lovely lacquer.
DIY MANICURE; 5 STEPS TO APPLY NAIL POLISH

S1. CLEAN NAILS
If your nails have too much moisturizer on them, nail polish will not adhere to them. As a result, you’ll need to wipe it off with a cotton pad and a little nail polish remover.
S2.APPLY BASE COAT
To make the color of your nail polish stand out, apply a base coat. This will keep your nails from staining (especially if you are wearing shades of red or blue). A base coat also extends the life of the nail polish.
S3. APPLY NAIL POLISH COLOR
Apply a thin coat of your chosen nail polish after the base coat has dried. Roll the bottle between your palms before applying the nail paint. Shaking it will make air bubbles, so don’t do that.
I always do 2 coats of nail polish but if it’s a dark nail color then 1 coat should do the trick. My technique for a clean neat finish is to start at the base of your nail and work your way up to the tip, this should be done in 3 vertical stripes, the middle of the nail and on both sides.
Remember to allow the previous layer of polish to dry before applying another coat if needed.
S4. APPLY TOP COAT
After your nail polish has dried, top it off with a layer of topcoat. This prevents chipping and flaking of the nail polish and helps your manicure last longer.
S5. CLEAN UP
Using a cotton pad or better yet for more control a cotton swab and nail polish remover, clean any nail polish that may have gotten on the skin around the nails.
Guys, there’s never a terrible moment to learn how to do your own DIY manicure at home, and I can’t stress how much it saves you money to treat yourself. Not only that but painting your own nails gives you a great sense of accomplishment. Join in the fun and keep an eye out for my upcoming blog.
Photo Credits: PINTEREST
Check Out My Latest Blog: https://fashonation.com/6-oversized-t-shirt-fashion-trendy-trend/
Check Out My Blogs: https://fashonation.com/members/be-you_trendy868/blog/
Start Blogging: https://fashonation.com/
Local SEO Services: https://marketprosdigital.com/
Follow Me On Pinterest: https://pin.it/3wtaw7z
Shop Using $1 Products With Referral link: https://www.shopmissa.com/?rfsn=6445339.5365716
Shop StansOut Beauty Co: https://stansoutbeauty.com/?sca_ref=1791777.t8LpG9AdjN
Recommended7 recommendationsPublished in Uncategorized


